Molecule visualization with Blender
So, suppose you have an exotic molecule in some chemistry program, maybe PyMOL or VMD, and it looks hideous in that tiny window. You want to give it a face lift by rendering it in a fancy fashion. You want to show it to your advisor and she will be happy, and let you do everyone else’s visualization work in the future. How do you do that?
The first step is of course to export your molecule to a 3D model. So far I have found that OBJ format is the most reliable. However, PyMOL does not export OBJ with textures, so you will just see a plain white material across the model, but maybe that is what you want.
Then you need to import the model in some 3D animation/rendering
package. We will use Blender. It was used
to be called Blender3D, when it was just a toy program with ugly UI,
but now it has become a full-featured 3D animation package, and its
new Cycles renderer is
very capable. Usually when you first import the model, it will have
some problems. A common one is duplicated vertices. It can be solved
by selecting the model, press Tab, then Space, and type “remove
doubles”. The menu now should have only one item. Press Enter on
it, and it will be done. Another problem you will see from time to
time is z-fighting. It
happens when you have two triangles at exactly the same location, and
the renderer does not know which one should be covered by the other.
This is different from duplicated vertices, because in this case, the
two triangles can belong to different meshes, and one is meant to
cover the other, it is just that the author of the chemistry software
is too lazy to do it correctly. In my case, my molecule looks like
this
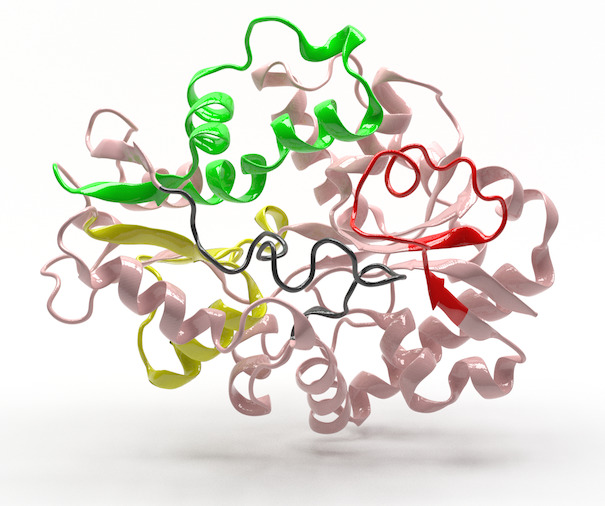
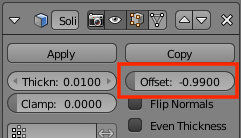
As you can see, portions of the mesh are colored. Those are seperated meshed that are exact copies of part of the main mesh, and therefore z-fight with the main mesh. My solution is to add a solidify modifier to these colored meshes, and set offset to be slightly larger than -1.
By doing so the colored meshes will be slightly blown up, and thus correctly cover the main mesh.
Now that we have fixed all the errors on the meshes, from this point on things are mostly up to your personal preference. My result is like this
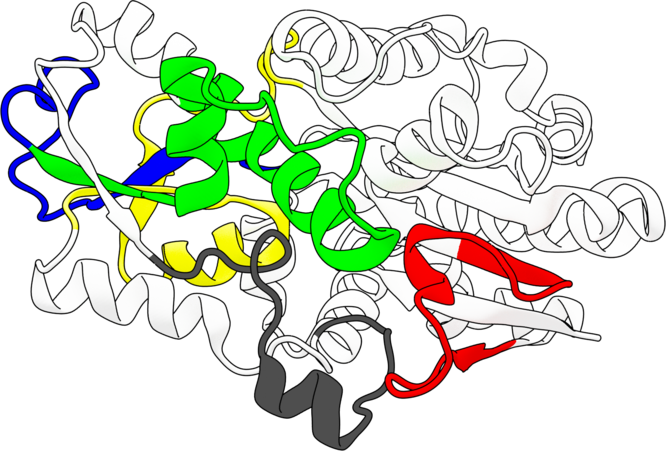
To achieve this kind of flat cartoon effect, you will need to light the whole model evenly and strongly (for example with a strong hemisphere light), and make 2 render layers. The 1st layer consists the main object without outline, and 2nd layer outline only. And then use the this node setup:
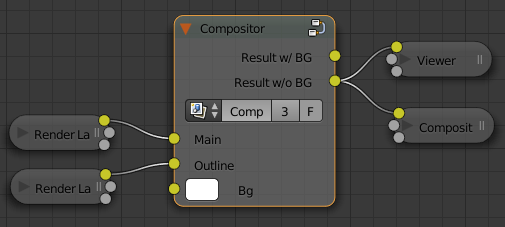
The Compositor node group is like this
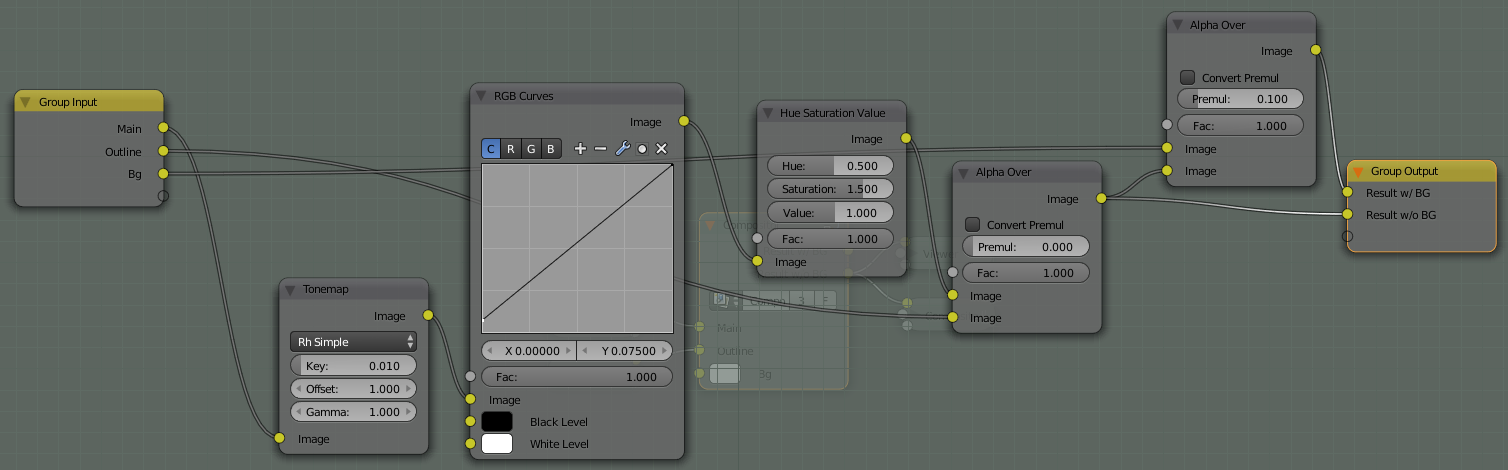
The Tonemap node is the key to achieve the flat effect, and the RGB Curves node is to brighten up the pure black material, so it will not be confused with the black outline.